


A Step-by-Step Guide to Successful Salesforce Marketing Cloud Implementation
source on Google
Table of Contents
source on Google
Deciding to go with Salesforce Marketing Cloud? Smart move.
But, implementing it is where things get tricky. Most teams expect a seamless rollout, only to encounter challenges with data modeling, automation flows, or integration gaps they didn’t see coming.
This guide breaks down the realities of Salesforce Marketing Cloud implementation what often goes wrong, what absolutely needs to go right, and the steps to make sure the platform delivers what it should: results.
Salesforce Marketing Cloud (SFMC) Implementation Best Practices
Here are some expert-guided best practices that one must keep in mind while planning for Salesforce Marketing Cloud (SFMC) implementation:
1. Pre-Implementation Phase
Following are the points to consider before you get into the core Salesforce Marketing Cloud implementation process:
A. Account Configuration & Setup
- User Roles & Permissions:
- Assign roles such as Administrator, Content Creator, and Data Analyst to ensure proper access control (can be considered as pre-requisites).
- Regularly review and audit user roles to prevent unauthorized access.
- Deactivate inactive users to free up the licenses.
2. Dedicated BU for Testing:
- Create a separate BU for testing new templates, automations, and journeys before deploying them in production.
- Use test data or internal team member’s data to avoid unintended impacts on live customer data.
3. Send Classification:
- Define transactional and commercial email send classifications.(in pre-requisite, explain it more and maybe share some screenshots)
- Send marketing/commercial emails with appropriate/suitable sender classification.
- Ensure compliance with regional laws such as GDPR, CAN-SPAM, and CASL.
- Maintain separate IPs for transactional and marketing emails.
4. Set Up Studios & Builders:
- Configure Email Studio, Content Builder, Automation Studio, and Journey Builder to support marketing activities.(can be mentioned in pre-requisite)
- Enable integrations with other systems such as CRM and eCommerce platforms.
All set with your planning and roadmap? Here are some key questions a Salesforce Marketing Cloud Consultant would ask to help your implementation run smoothly.
Pre-Implementation for Salesforce Marketing Cloud: Questions to Address Before You Begin
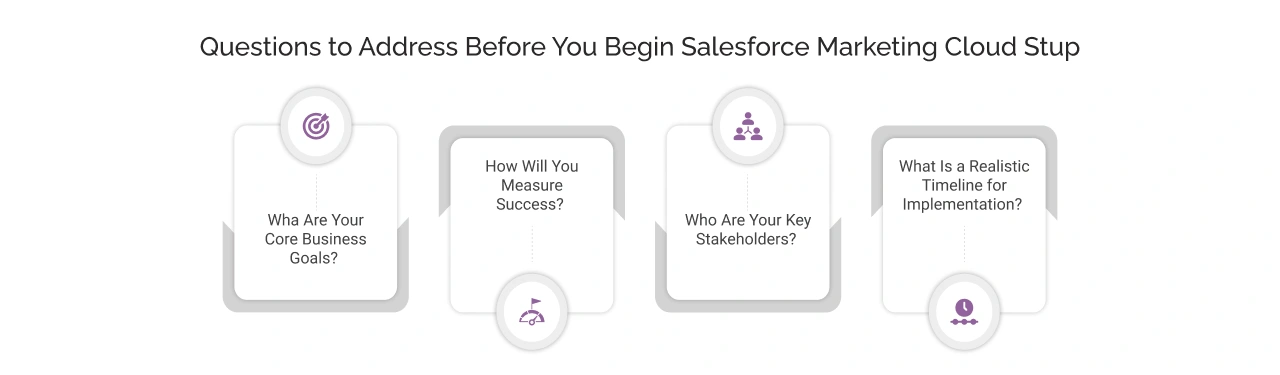

Before launching into the technical implementation of Salesforce Marketing Cloud (SFMC), successful organizations take time to align strategy, resources, expectations. Leveraging the right Salesforce Marketing Cloud features is key to executing each stage of your marketing strategy. Below are the four foundational pillars you should evaluate in detail to set your implementation up for long-term success.
1. What Are Your Core Business Goals?
Start by clarifying why you’re investing in Salesforce Marketing Cloud. Are you focused on:
- Email marketing performance (e.g., improving open/click-through rates)?
- Omnichannel customer engagement (combining SMS, push notifications, email, and social)?
- Automated customer journey orchestration (mapping lifecycle journeys across segments)?
- Data unification and personalization at scale?
This clarity helps determine which SFMC Studios and Builders to implement first—whether that’s Email Studio, Journey Builder, Mobile Studio, or Interaction Studio (Personalization).
Define no more than 3–4 business outcomes to prioritize early in the implementation.
2. How Will You Measure Success?
Your SFMC setup should tie directly to measurable KPIs, not just marketing activity. Define both primary metrics (aligned with business value) and operational metrics (tied to platform health).
Primary KPIs to consider:
- Conversion rate per channel or campaign
- Cost per lead (CPL) / Cost per acquisition (CPA)
- Marketing-attributed revenue or ROI
- Subscriber growth or retention
Operational KPIs:
- Email deliverability and inbox placement
- Unsubscribe rate
- Bounce rate
- Engagement rate per segment
You should also plan for dashboarding and reporting from Day 1 whether through SFMC’s Analytics Builder or integrations with Tableau/CRM Analytics.
3. Who Are Your Key Stakeholders?
Salesforce Marketing Cloud is not a plug-and-play tool, it requires collaboration across departments to be effective.
| Role | Responsibilities |
|---|---|
| Marketing Team | Content creation, campaign setup, journey mapping |
| IT / Data Team | Data modeling, integrations (CRM, POS, website), IP warming |
| Legal & Compliance | Ensuring adherence to GDPR, CAN-SPAM, CCPA, data governance |
| Leadership / Executives | Aligning SFMC initiatives to strategic goals, approving budgets |
To avoid delays and misalignment, assign clear owners for each task, and make sure everyone understands the roadmap.
4. What Is a Realistic Timeline for Implementation?
There is no such predefined timeline for implementing Salesforce Marketing Cloud. Every business starts from a different place. On average, most of the implementations for mid-sized companies take a couple of weeks when you align a team of experts having expertise in Salesforce implementation services.
It is advised to take a good time to plan your data structure, define customer journeys, and test properly before going live to get the most value out of your investment in the long run. A slightly slower start often leads to a much smoother launch, and fewer headaches later.
So while timelines can vary, the best approach is to stay flexible, set clear milestones, and keep everyone in sync along the way.


How to Setup Salesforce Marketing Cloud? Step-by-Step Guide
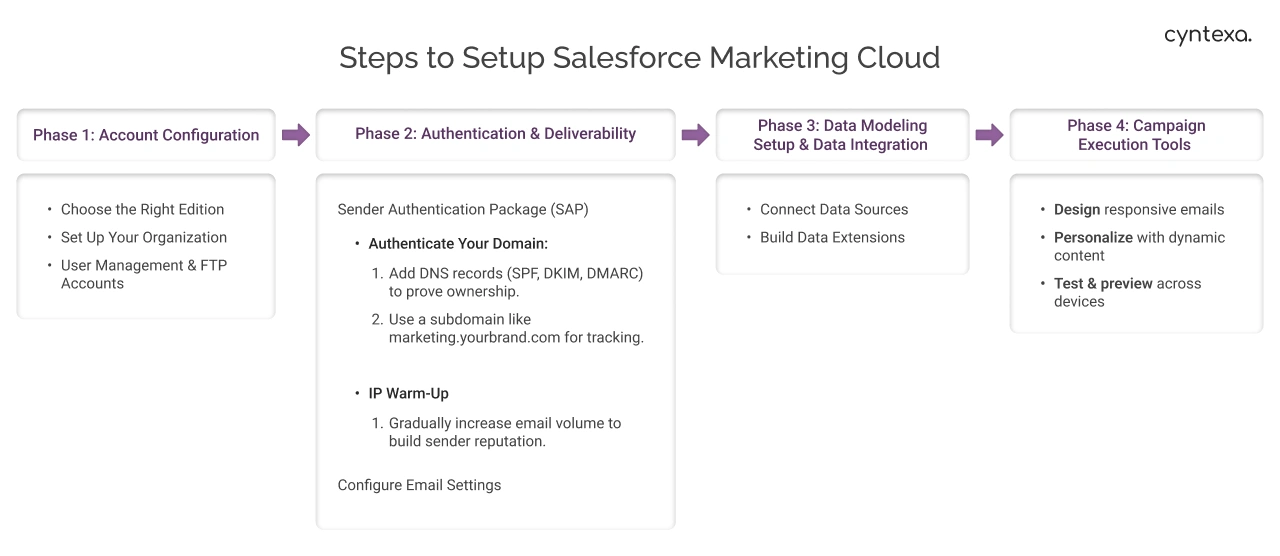
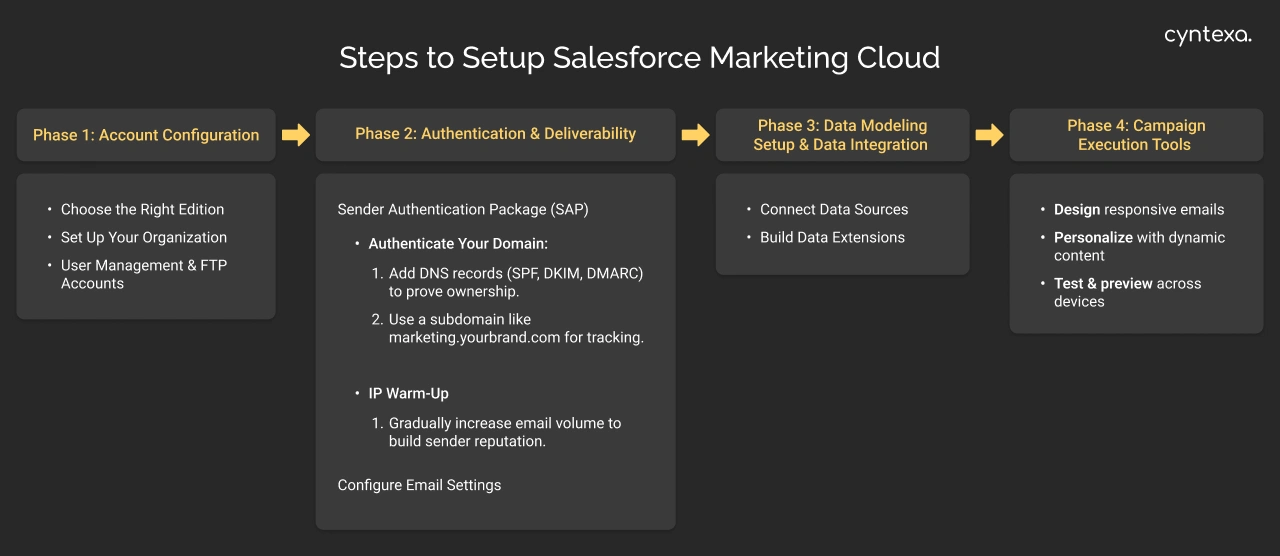
Phase 1: Account Configuration
The first phase of implementation focuses on configuring the Salesforce Marketing Cloud account according to organizational requirements.
Step 1: Choose the Right Edition
Salesforce offers three Marketing Cloud Engagement editions in 2025:
| Editions | Best For |
|---|---|
| Professional | Small Teams, basic email campaigns |
| Enterprise | Mid-Market, multi-channel needs |
| Corporate | Highly regulated industries |
After purchasing marketing cloud engagement, you have to check your MID Member Identification Code.
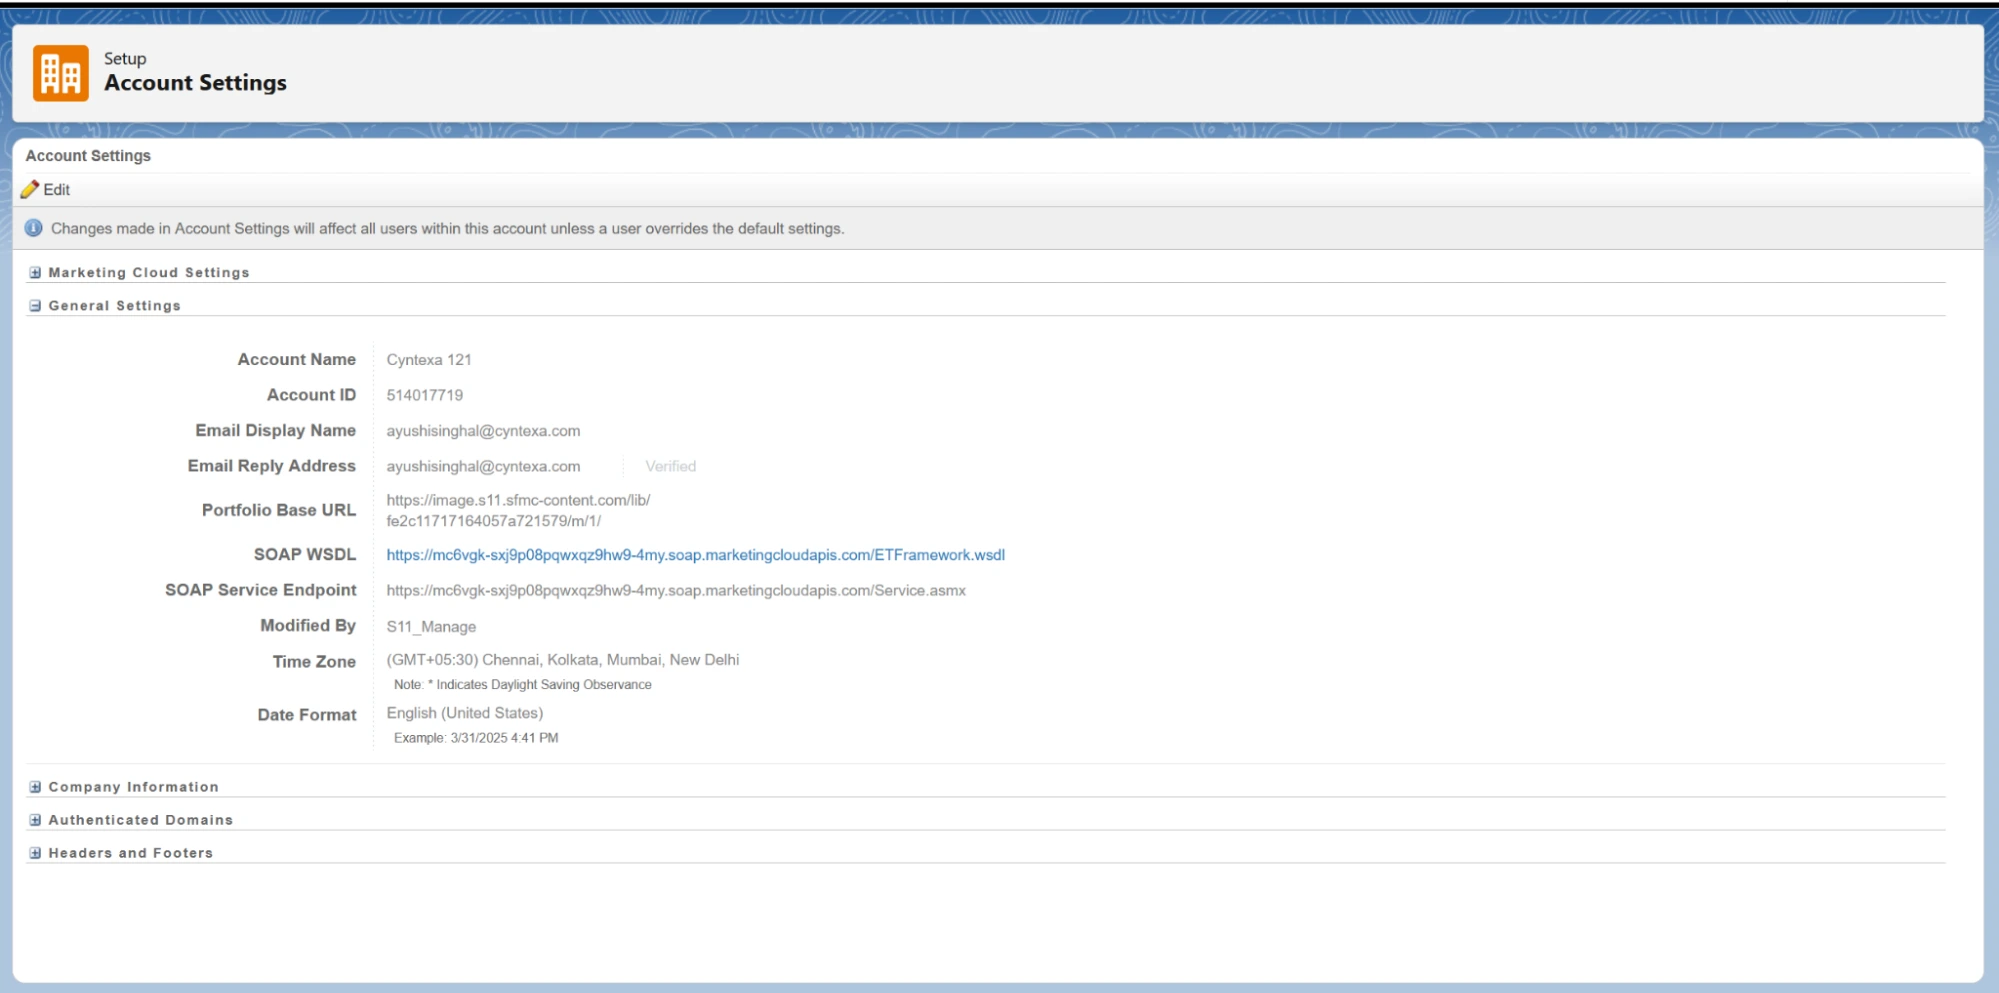
Step 2: Set Up Your Organization
- Locate Your MID (Member ID):
Go to Setup > Account Settings > Account Information. The MID is critical for API integrations and support.
- Configure Business Units (BUs):
- Navigate to Setup > Business Units > Create
- Create separate BUs for regions, brands, or testing/production.
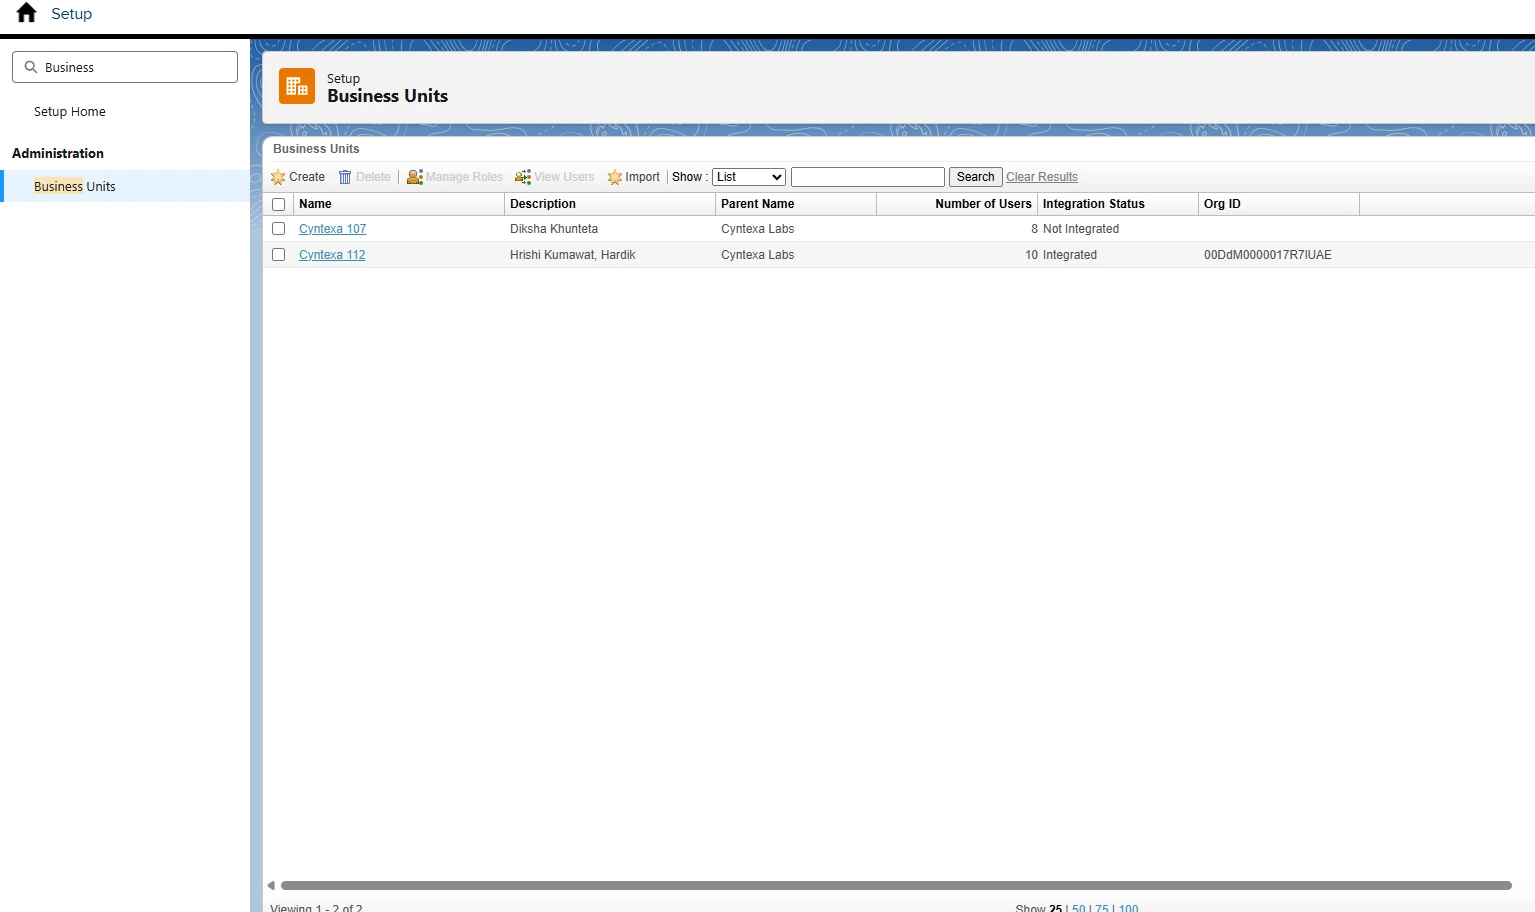
- Complete all required fields in the form.
- Pay special attention to “unsubscribe settings” at the bottom.
Choose between two options:
Option 1: Subscribers will be unsubscribed from all business units in the enterprise
Option 2: Subscribers will only be unsubscribed from the specific business unit
It’s recommended to create at least two BUs for testing and deployment to ensure a smooth email marketing process.
Step 3: User Management & FTP Accounts
- Create users under Setup > User Management > Create User.
- Assign roles (e.g., Marketing Cloud Admin, Content Creator) using predefined or custom roles.
- Use Permission Sets to grant access to tools like Journey Builder or Email Studio.
Salesforce Marketing Cloud uses Secure File Transfer Protocol (SFTP) for securely accessing, transferring, and managing large files and sensitive data. To add new FTP users: - Navigate to the “FTP Accounts” option in the “Data Management” tab of the “Administration” menu
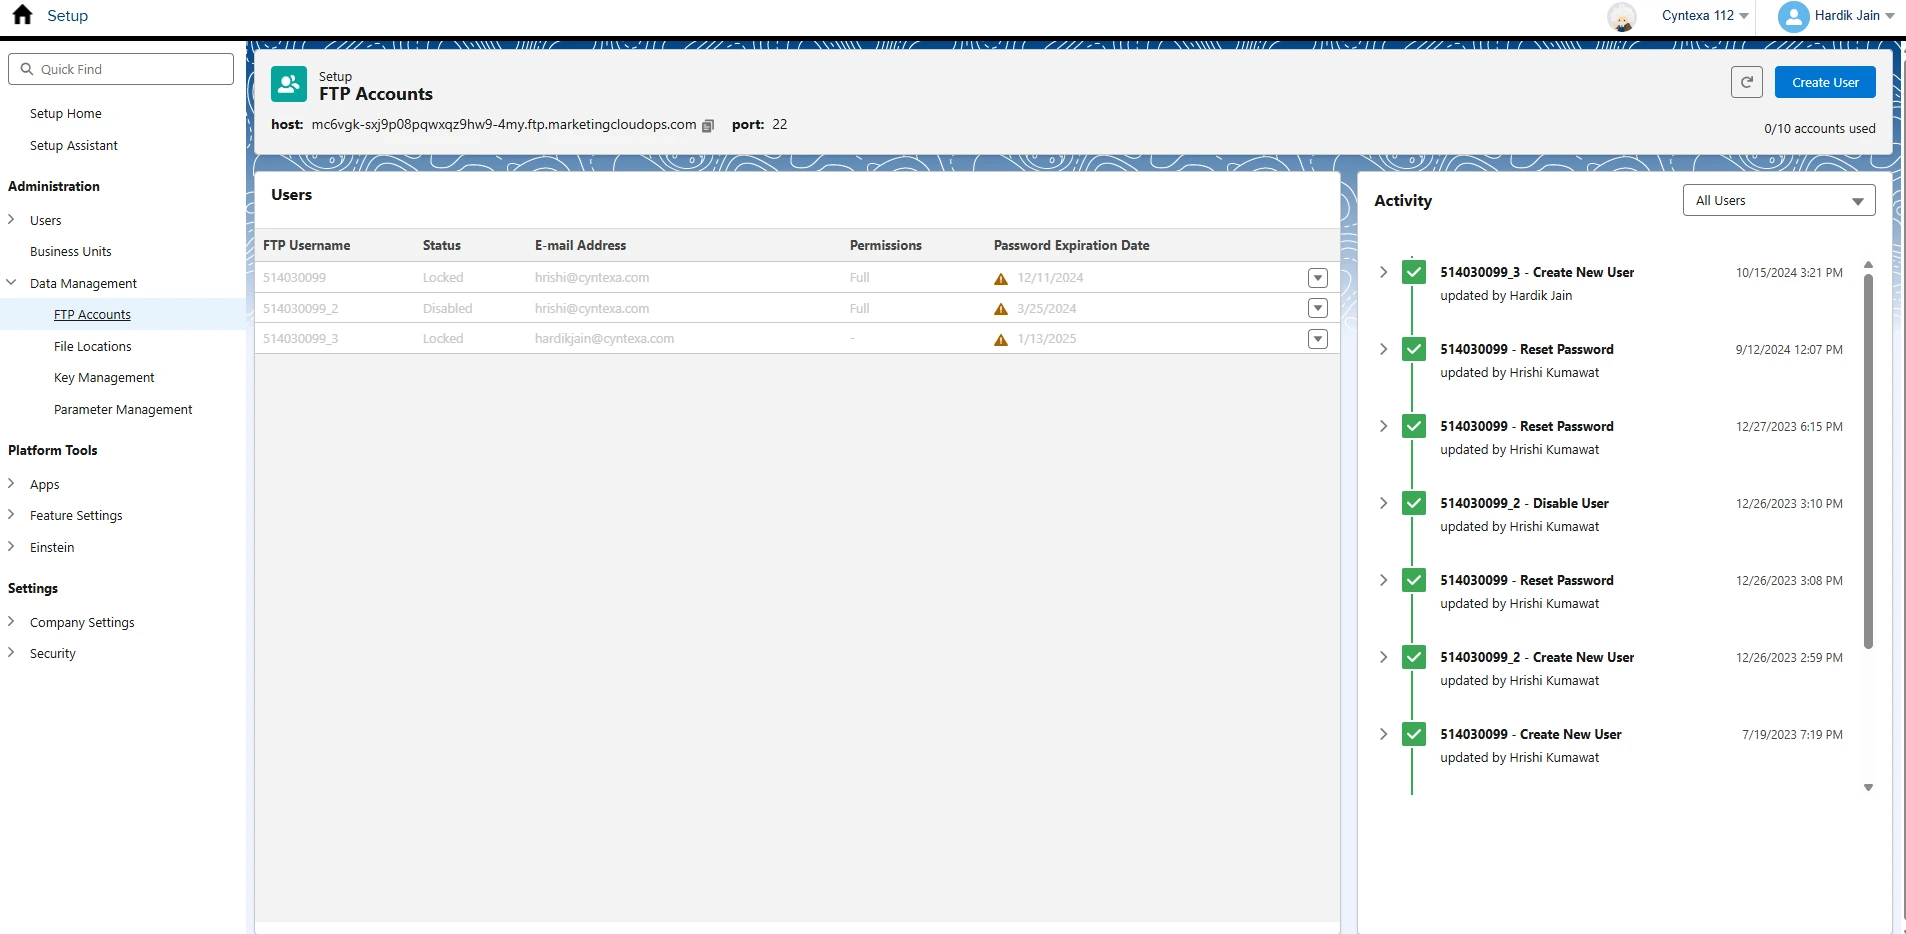
- Configure user credentials and access permissions
- Ensure proper security protocols are followed
Phase 2: Authentication & Deliverability
Sender Authentication Package (SAP)
SAP ensures emails don’t land in spam. Work with Salesforce support to:
- Authenticate Your Domain:
- Add DNS records (SPF, DKIM, DMARC) to prove ownership.
- Use a subdomain like marketing.yourbrand.com for tracking.
- IP Warm-Up:
- Gradually increase email volume to build sender reputation.
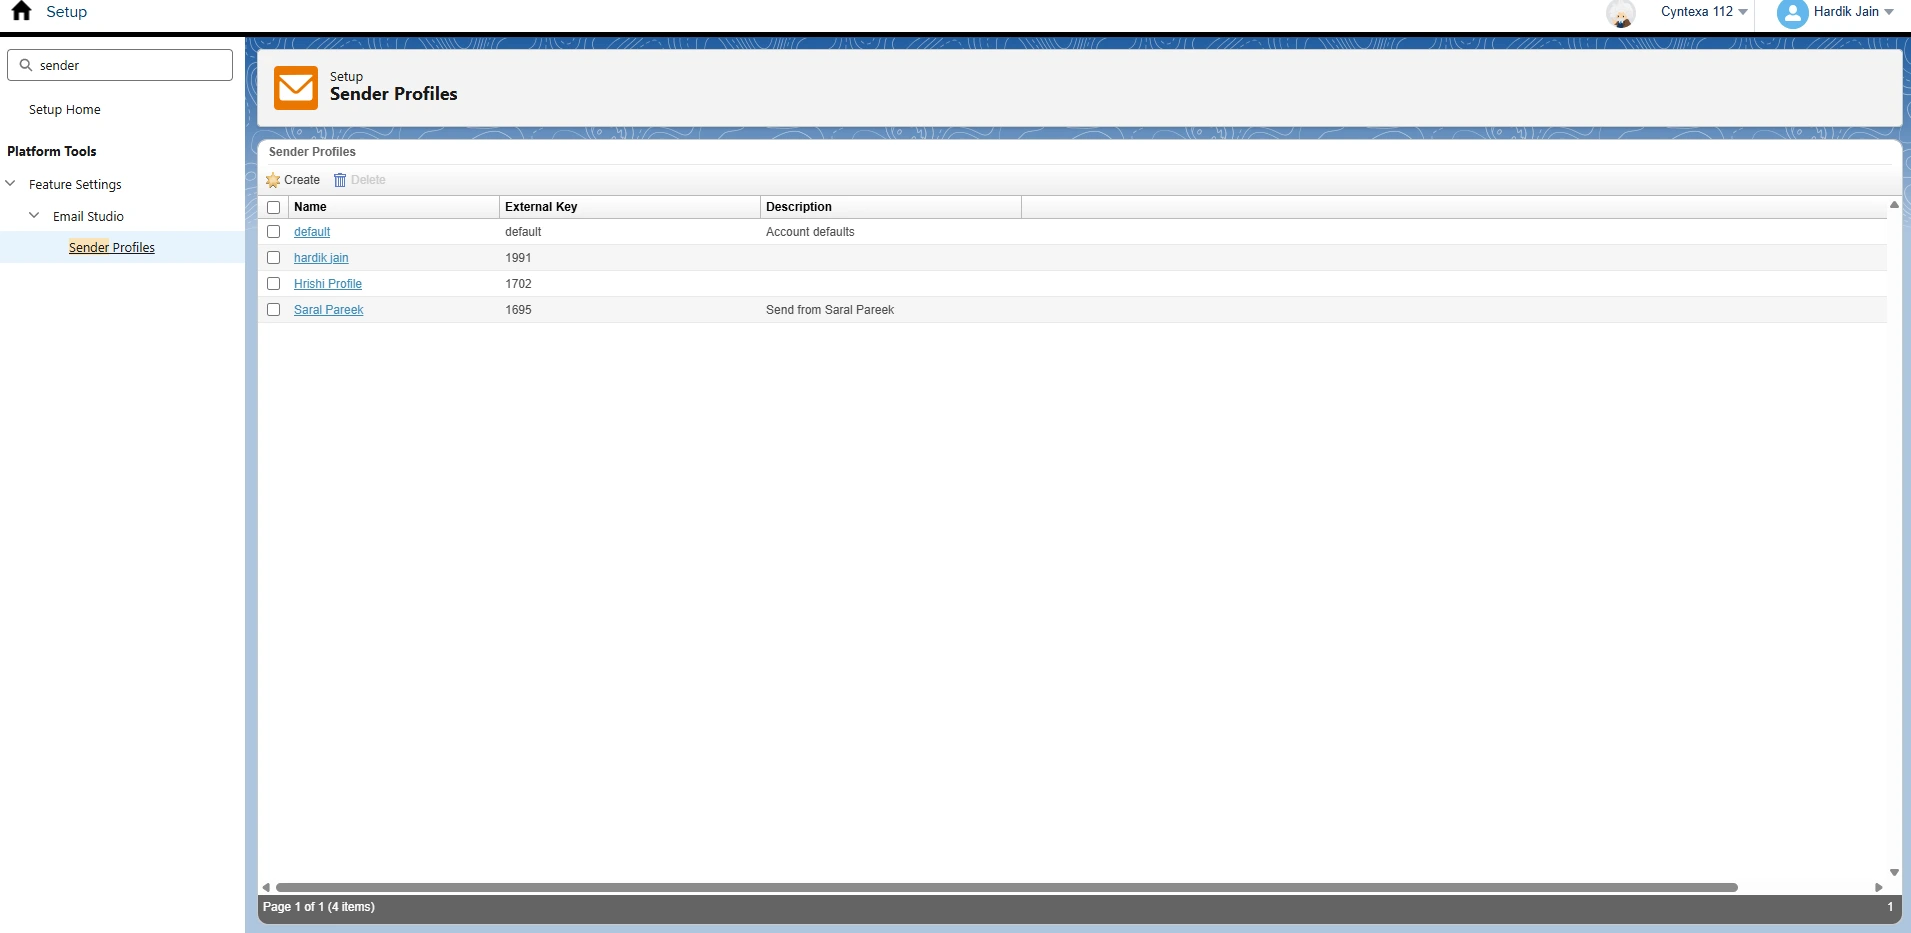
Configure Email Settings
- Sender Profiles:
- Define “From” names/addresses under Setup > Marketing Settings > Sender Profiles.
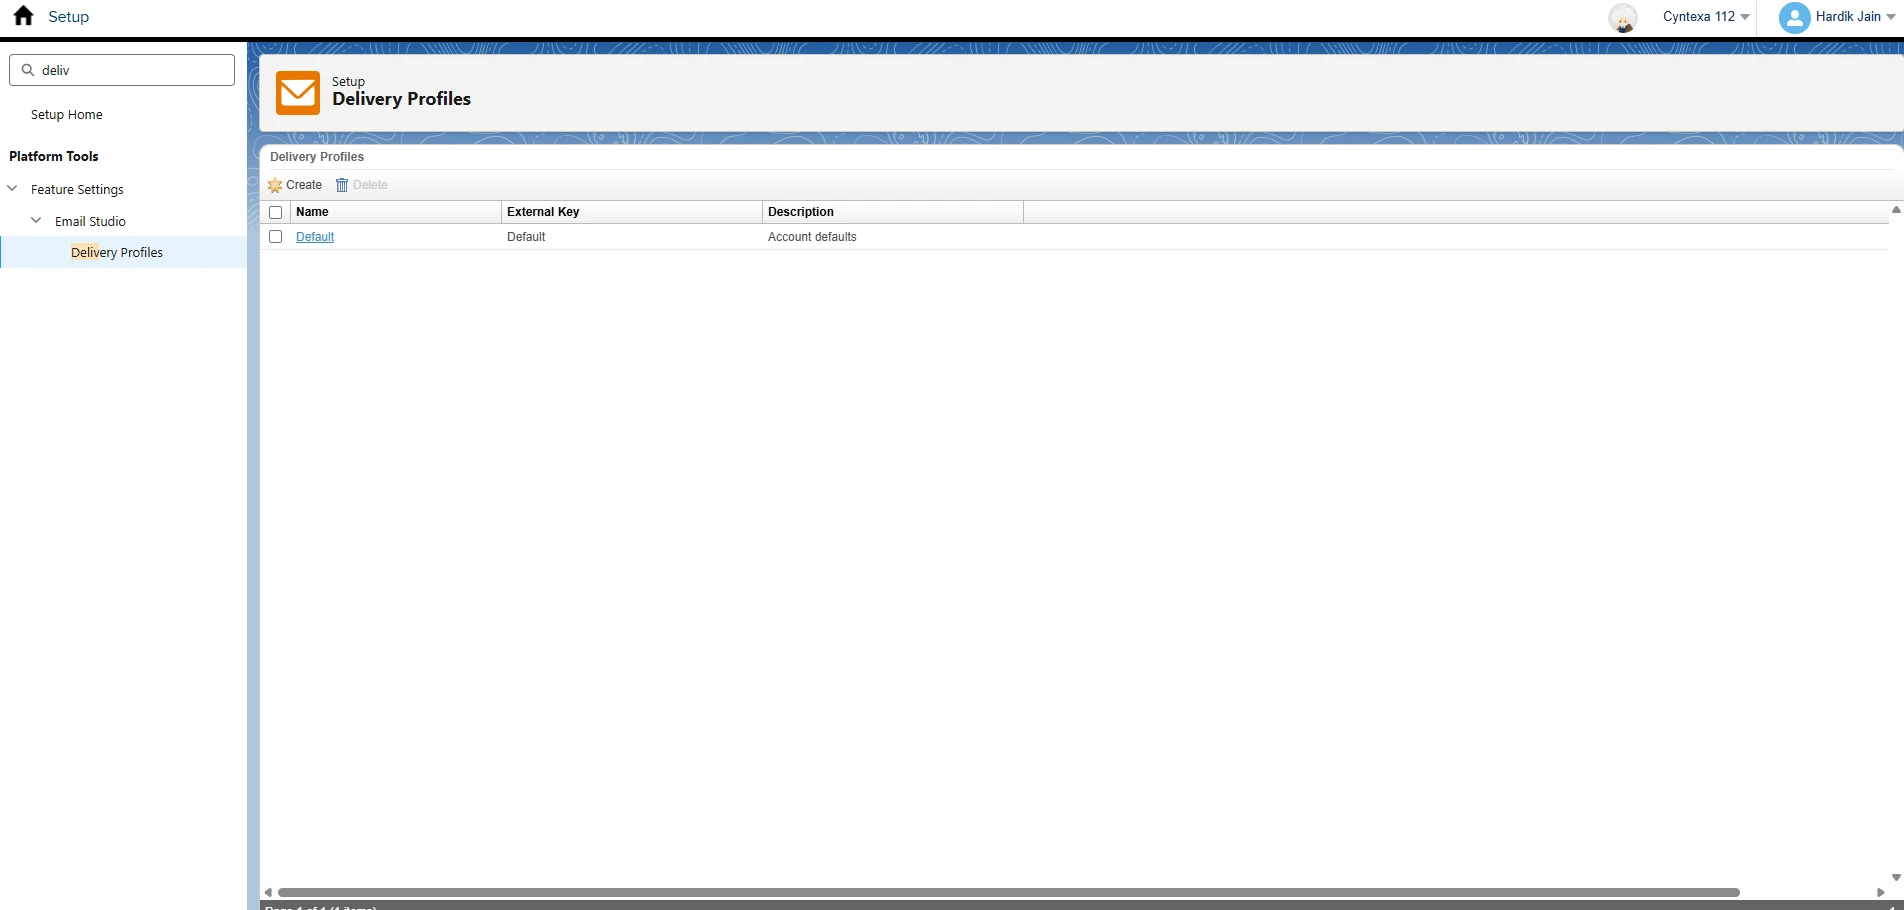
- Delivery Profiles:
- Assign dedicated IPs for high-volume senders under Setup > Marketing Settings > Delivery Profiles.
Phase 3: Data Modeling Setup & Data Integration
1. Connect Data Sources:
- Marketing Cloud Connect: Sync Salesforce CRM data (Leads, Contacts) to SFMC. MCC integrates the digital marketing capabilities of Marketing Cloud with Salesforce’s data management, segmentation, and campaign management tools.
- API Integrations: Use REST/SOAP APIs or AWS S3 for bulk data transfers.
- SFTP: Securely import/export data via Setup > Data Management > FTP Accounts.
2. Build Data Extensions
- Replace legacy Data Lists with Data Extensions for flexible data storage.
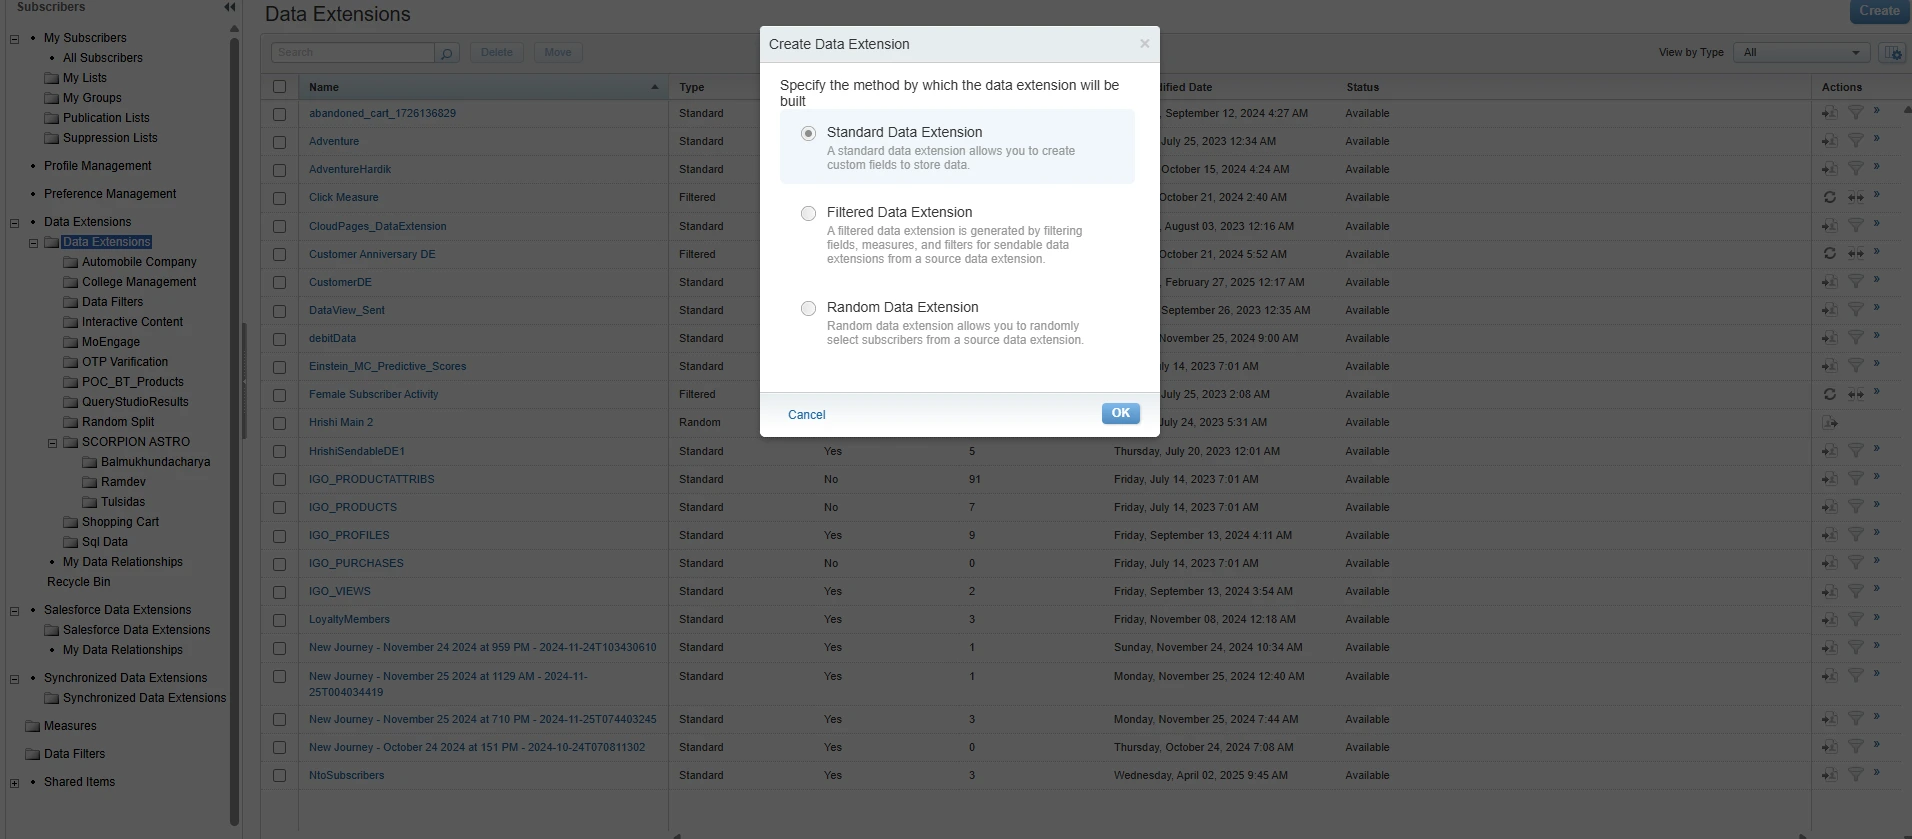
- Create extensions for:
- Customer profiles (email, phone, preferences)
- Transactional data (purchase history, cart items)
- Miscellaneous (subscriber’s preferences, contents etc.)
Phase 4: Campaign Execution Tools
The final phase involves implementing key Salesforce Marketing Cloud tools to create, manage, and optimize marketing campaigns.
Email Studio & Content Builder
- Design responsive emails with Content Builder (drag-and-drop templates).
- Use Dynamic Content for personalization (e.g., “Hi, %%FirstName%%”).
- Test renders with Email Preview.
This will help you get started with the Salesforce Marketing Cloud.
Now that you understand the implementation steps, our Implementation E-Guide will help you optimize Salesforce Marketing Cloud for long-term success. It’s packed with expert tips and strategies to ensure smooth adoption and maximize your results. Grab your copy below!
Best Practices for Salesforce Marketing Cloud (Post-Implementation Phase)
After the initial implementation, ensuring long-term success with Salesforce Marketing Cloud depends on how effectively it’s adopted and optimized. This is where best practices matter most and here we have curated the guided best practices for each segment:
Content Management Best Practices
1. Use Pre-Built Templates:
- Utilize SFMC’s drag-and-drop templates for consistent branding.
- Standardize email structures, including headers, footers, and legal disclaimers.
2. Dynamic Content:
- Personalize emails using AMP script or Dynamic Content Blocks to create messages based on customer preferences.
- Test different variations of content to improve engagement.
3. Spam-Free Language:
- Avoid Frequent capitalization and trigger words like “free” or “urgent.”
- Use a spam checker tool to validate email content before sending.
4. Clear CTAs (Call-to-Actions):
- Ensure every email includes a prominent CTA for smooth engagement.
- Use action-oriented language like “Shop Now” or “Download the Guide.”
Audience & Segmentation
Define primary keys in data extensions to ensure data integrity and apply indexes to frequently queried fields for faster performance.
1. Use Filters:
- Apply data filters to create targeted audience segments.
- Segment based on demographic, behavioral, and transactional data.
2. Use Queries for Advanced Logic:
- Utilize SQL queries in Automation Studio for complex segmentations.
- Write sql so optimized that it will not take more than 30 minutes to execute.
- Implement exclusion logic to avoid over-messaging customers.
- Optimize SQL queries for performance by avoiding unnecessary joins and subqueries.
Email Send Best Practices
1. Publication List:
- Maintain publication lists for managing different types of email communications (newsletters, promotions, etc.).
- Provide clear opt-in and opt-out options.
2. Preference Center:
- Allow users to update their subscription preferences and communication frequency.
- Regularly update the preference center based on customer feedback.
3. Suppression List:
- Maintain a suppression list to exclude unsubscribed, bounced, or complaint-generating contacts.
- Include a physical address, unsubscribe option, and clear sender identity in all emails to comply with regulations.
Automation Best Practices
1. Automate the Campaign:
- Use Automation Studio for recurring campaigns such as welcome series and cart abandonment emails.
- Set up event-triggered automations for real-time engagement.
2. Set Recommended Schedule Time:
- Analyze historical data to determine the best times for sending emails.
- Schedule emails based on customer time zones.
- Do not request a new access token for every API call you make.
- Use enhanced FTP for secure and automated data imports, ensuring efficient data handling.
Journey Builder Best Practices
1. Set Exit Criteria & Goal Criteria:
- Define clear exit criteria to remove customers from journeys when they achieve a goal.
- Set goals such as email opens, link clicks, or purchases to measure journey success.
- Use A/B testing to optimize journey effectiveness.
Web Studio Best Practices
1. Purchase SSL Certificates to secure the following URLs:
- Cloudpages
- Email Tracking Links
- Email View as a Web Page
- Content Builder Content
2. Error Logging:
- Implement logging mechanisms to capture API failures, form submission errors, and other critical issues.
- Store logs in a secure location for troubleshooting and audits.
3. Failure & Success Page:
- Create custom pages to display when a form submission succeeds or fails.
- Provide clear messaging and next steps for users.
Reports & Performance Measurement
1. Track Email Performance:
- Using standard reports monitor key metrics such as open rates, click-through rates (CTR), bounce rates, and unsubscribe rates.
2. Analyze Audience Engagement:
- Segment audiences based on engagement levels to tailor future messaging.
- Identify inactive subscribers and implement re-engagement strategies.
3. Optimize Future Campaigns:
- Use A/B testing insights to refine email content and design.
- Adjust send times, subject lines, and segmentation strategies based on performance data.
Salesforce Marketing Cloud Pricing
Salesforce Marketing Cloud pricing starts from 25 USD/ User/ Month for the “Starter Suite” edition. It offers different editions that are suitable for every business need.


Conclusion
With the changing marketing dynamics, leveraging the power of Salesforce Marketing Cloud is essential to acquire higher results. By implementing this platform successfully, businesses can take their marketing efforts to the next level and get various benefits.
However, if you are still confused about the implementation process, consult a partner with expertise in Salesforce marketing cloud implementation services. Cyntexa offers a range of implementation experts who can help you with all the technicalities and intricacies and guarantee the success of your business.
Don’t Worry, We Got You Covered!
Get The Expert curated eGuide straight to your inbox and get going with the Salesforce Excellence.
AUTHOR
Neha
Vlocity (Salesforce Industries)
Neha is a Salesforce Industries (Vlocity) specialist with 10+ years of experience and 6+ certifications. Her deep domain knowledge enables her to design and implement industry-specific Salesforce solutions that streamline operations and accelerate business outcomes. Neha is committed to delivering measurable impact by aligning technology with sector-specific challenges in telecommunications, insurance, and other verticals.


Cyntexa.
Join Our Newsletter. Get Your Daily Dose Of Search Know-How

